Act as a senior journalist and professional content writer to write 1500+ words news article, SEO-optimized news article,, easy-to-understand news article. Begin with a compelling, keyword-rich title wrapped in an H1 HTML tag (
). Follow with a bolded one-paragraph summary wrapped in a div with the class name “yellowbg” (
[Insert Summary]
). Structure the article with an engaging lead paragraph that answers the 5 Ws and 1 H (Who, What, Where, When, Why, and How), followed by informative subheadings (use
for main subheadings and
for supporting subheadings). Include bullet points for key highlights, relevant quotes, and data where applicable. Use simple, clear language for broad accessibility. Conclude with a strong closing paragraph, a list of keyword-rich terms, and relevant hashtags. Ensure the content is well-structured, concise, and tailored for readability while maintaining a professional tone. Example format:
[Insert Title]
, Summary:
[Insert Summary]
, Lead: [Engaging opening answering 5 Ws and 1 H],
[Main Subheading]
, [Key points],
[Supporting Subheading]
, [Key points], Conclusion: [Closing paragraph], Keywords: [List], Hashtags: [List]. Rewrite the following content accordingly:
Google Wallet is more than Google’s tap-to-pay app. Over the years, Wallet has expanded into a sort of all-in-one digital document manager for anything and everything you might keep in a real wallet — transit passes, event tickets, store loyalty cards, and more.
Last August, Wallet got support to create custom passes for pretty much anything, and more recently, Google rolled out the ability to edit those passes without having to completely recreate them from scratch. If you haven’t interacted with this Wallet’s custom pass functionality much, there’s quite a bit to wrap your head around. Here’s everything you need to know.
What is a custom pass?
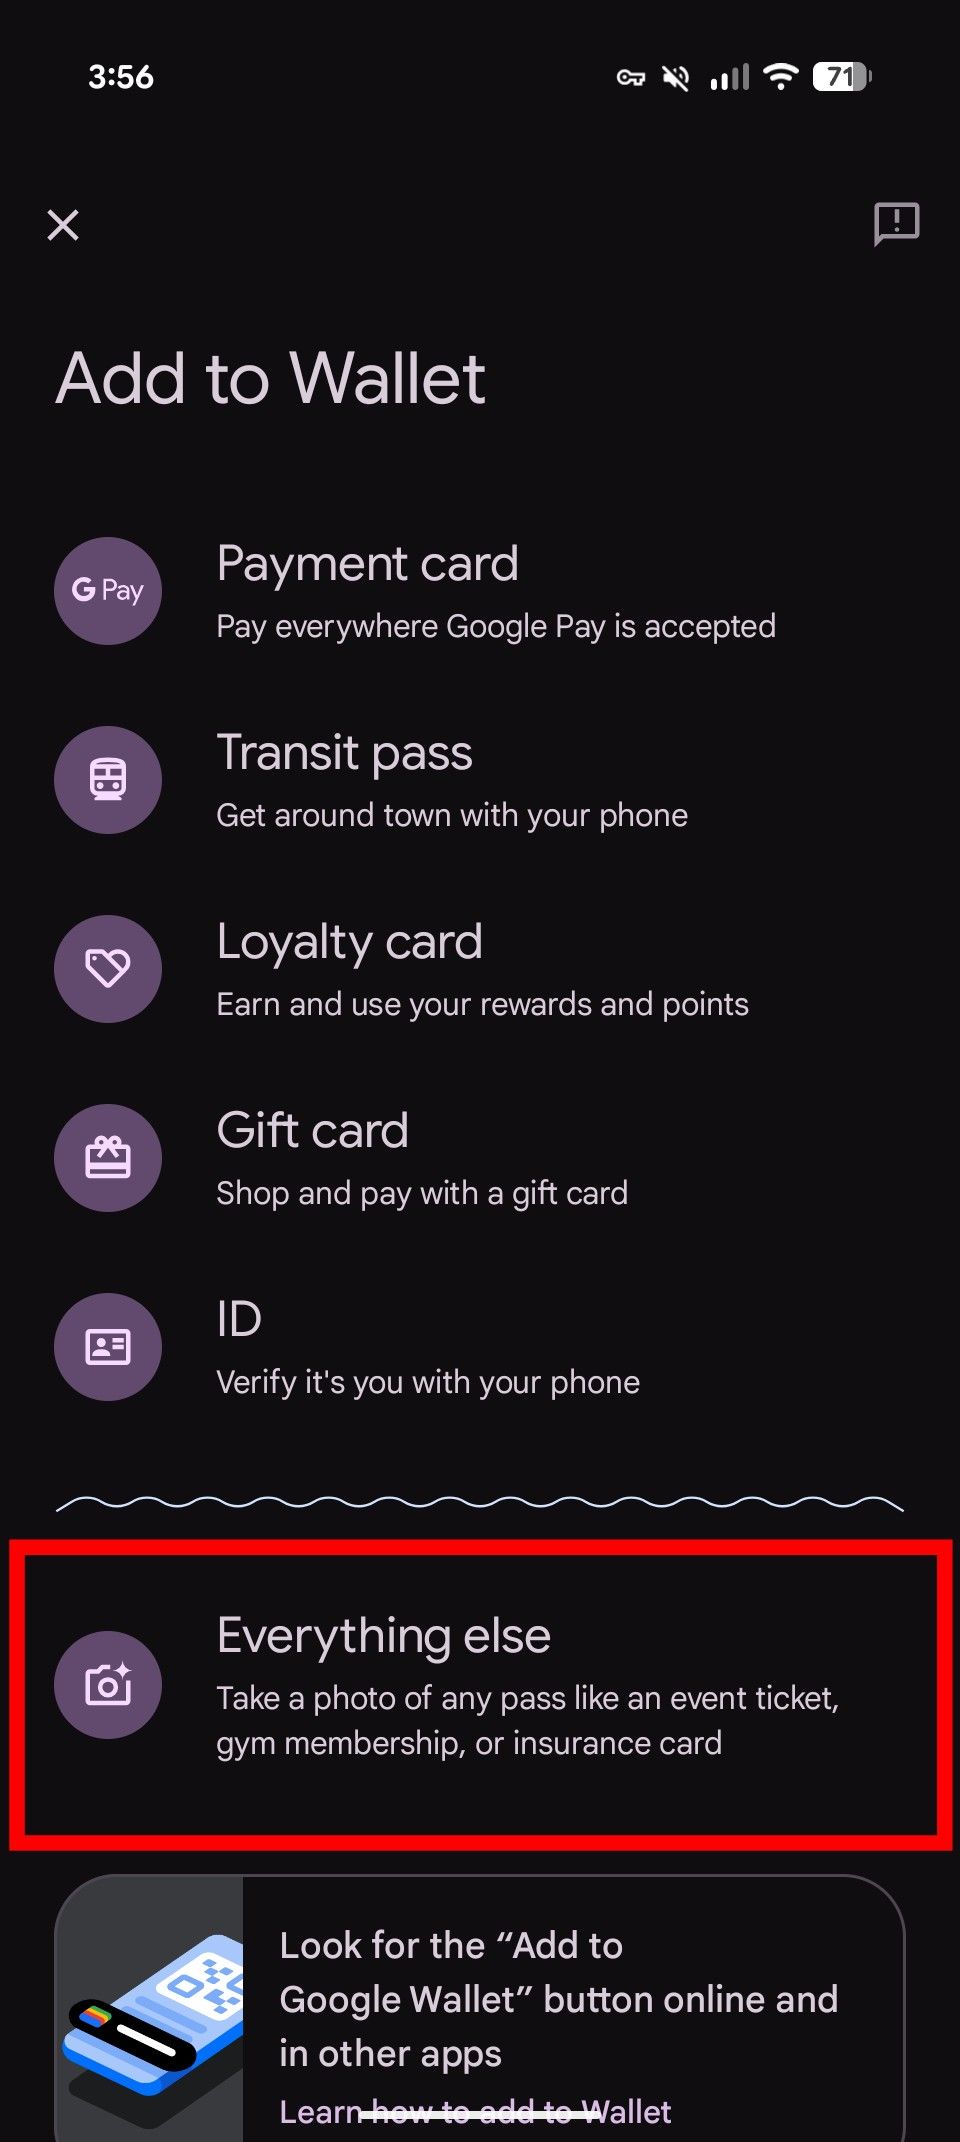
Google Wallet’s got bespoke onboarding for payment cards, transit passes, loyalty cards, gift cards, and IDs. For anything else, you can use an Everything else option to create a custom pass.
When you add a pass through this method, Wallet will do its best to automatically detect the type of document you’re uploading to give the resulting digital pass relevant artwork. It can detect event tickets, insurance cards of multiple types, loyalty cards, student IDs, business cards, and more. Any document that doesn’t fall into one of Wallet’s predefined buckets will be added as “Other.”
Creating a custom pass only takes a few steps, and Google Wallet does most of the work for you. The main thing you have to do manually is scan the document using your phone’s camera. Here’s how it works.
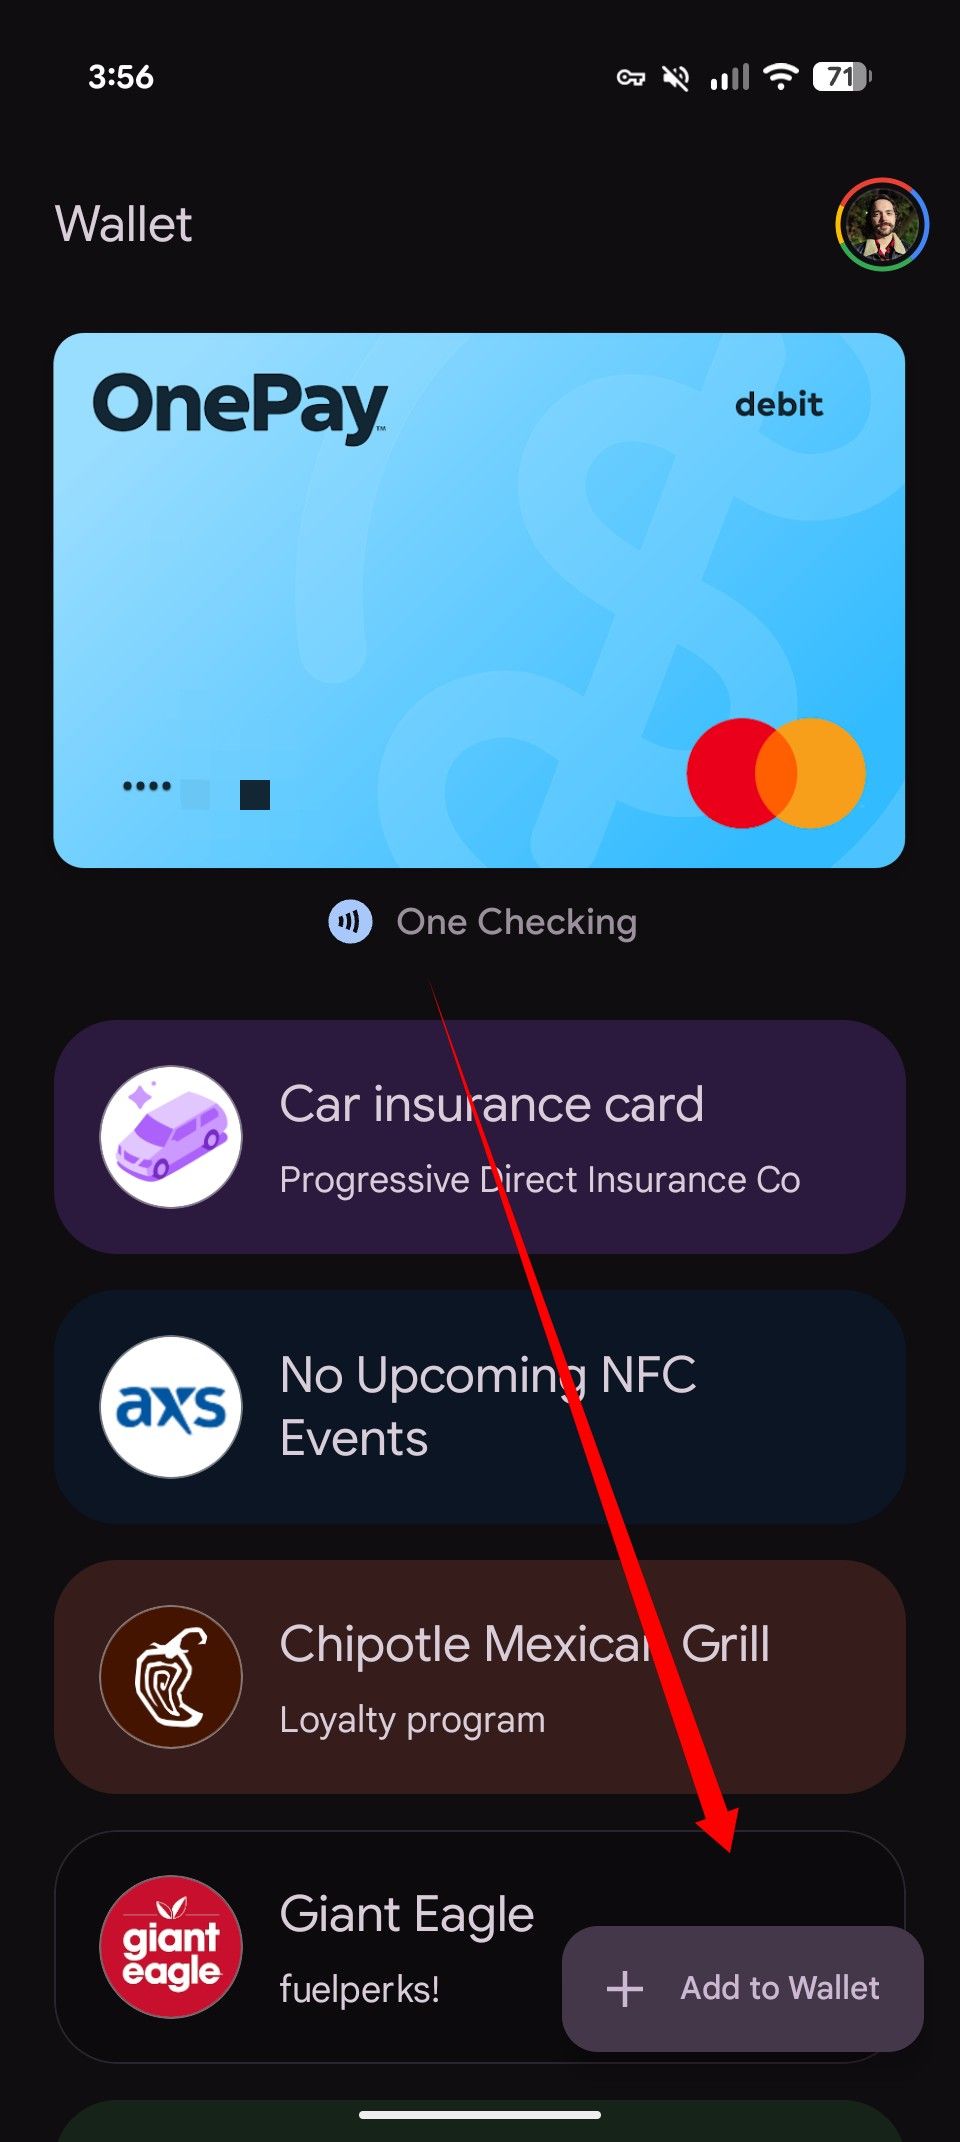
Open the Google Wallet app.
Tap the Add to Wallet button in the lower right corner.
Tap Everything else.
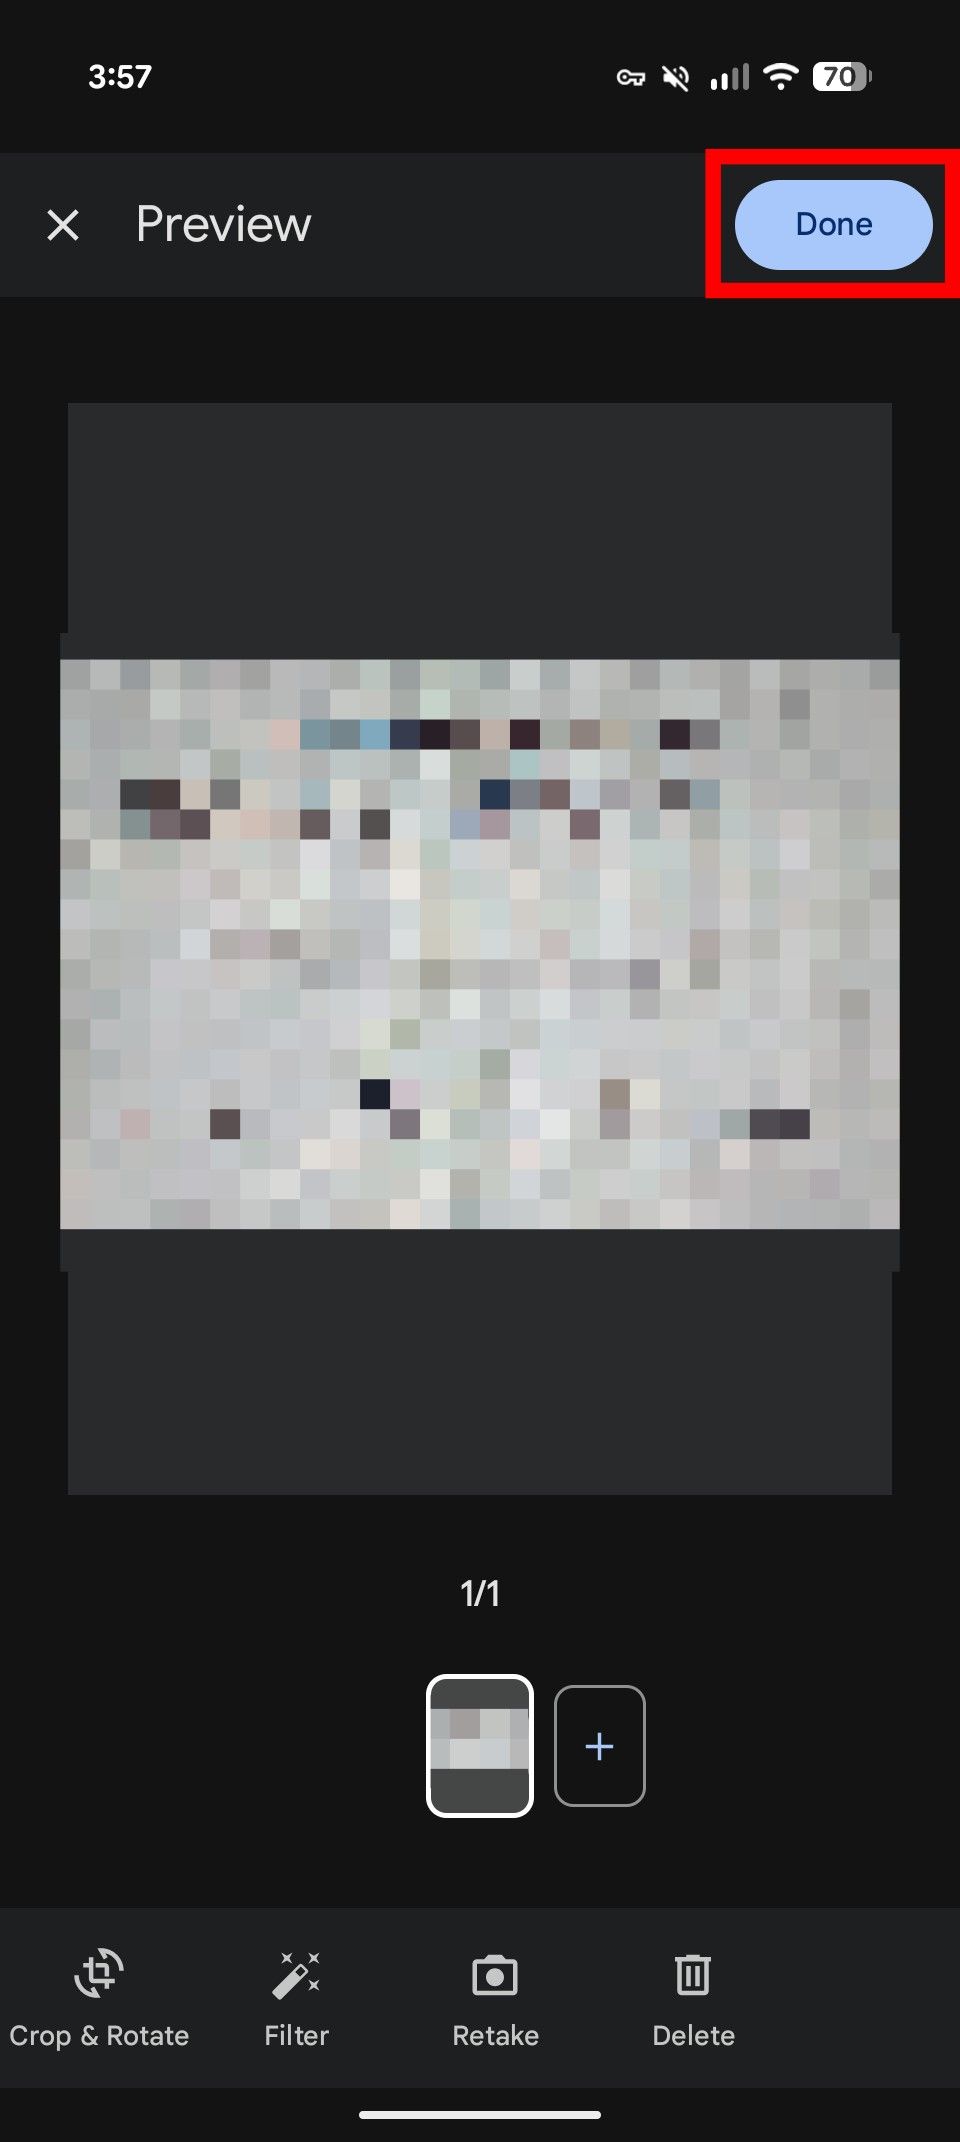
Line your document up in the viewfinder and tap the capture button.
On the next screen, you can crop, rotate, or retake the photo. If what you got looks good, tap Done.
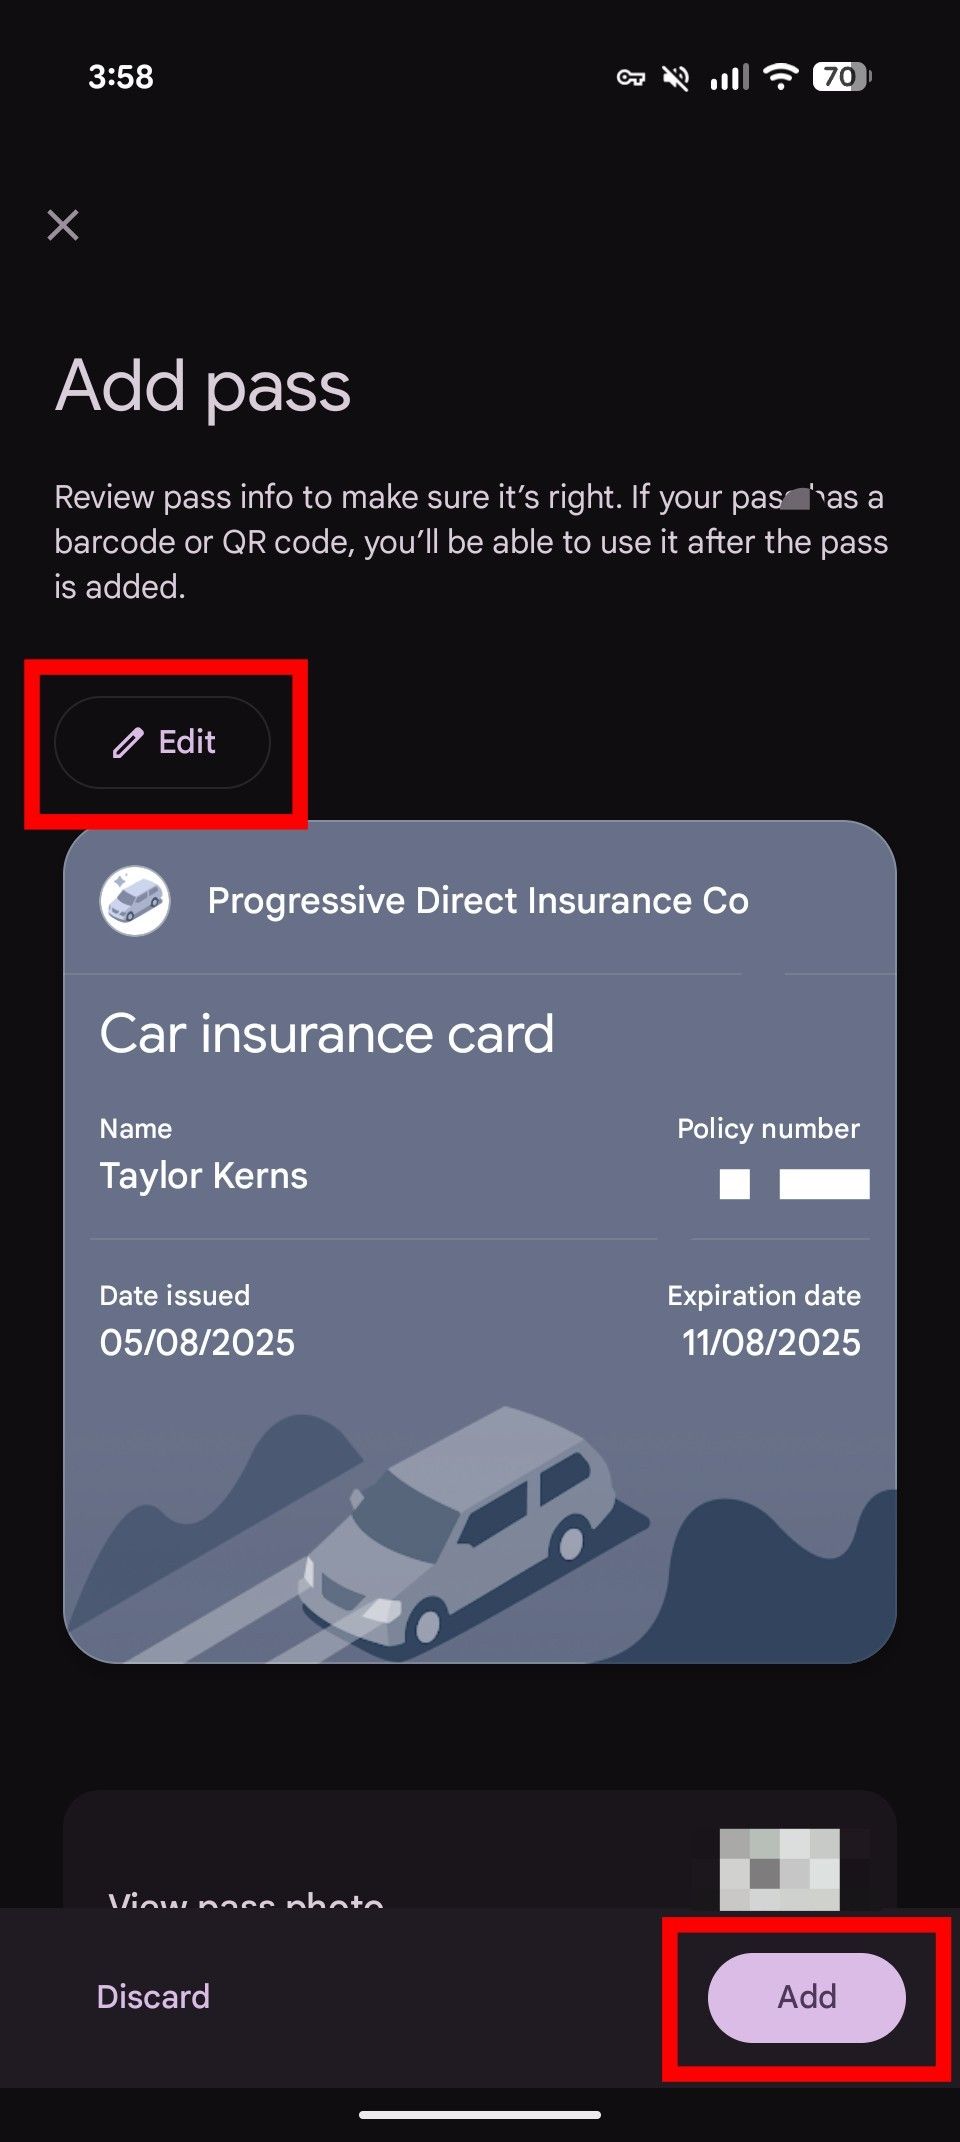
Wallet will take a moment to process, then show the resulting pass.
Verify the info on your custom pass is correct. If it’s right, tap Add. If it’s incomplete or inaccurate, tap Edit.
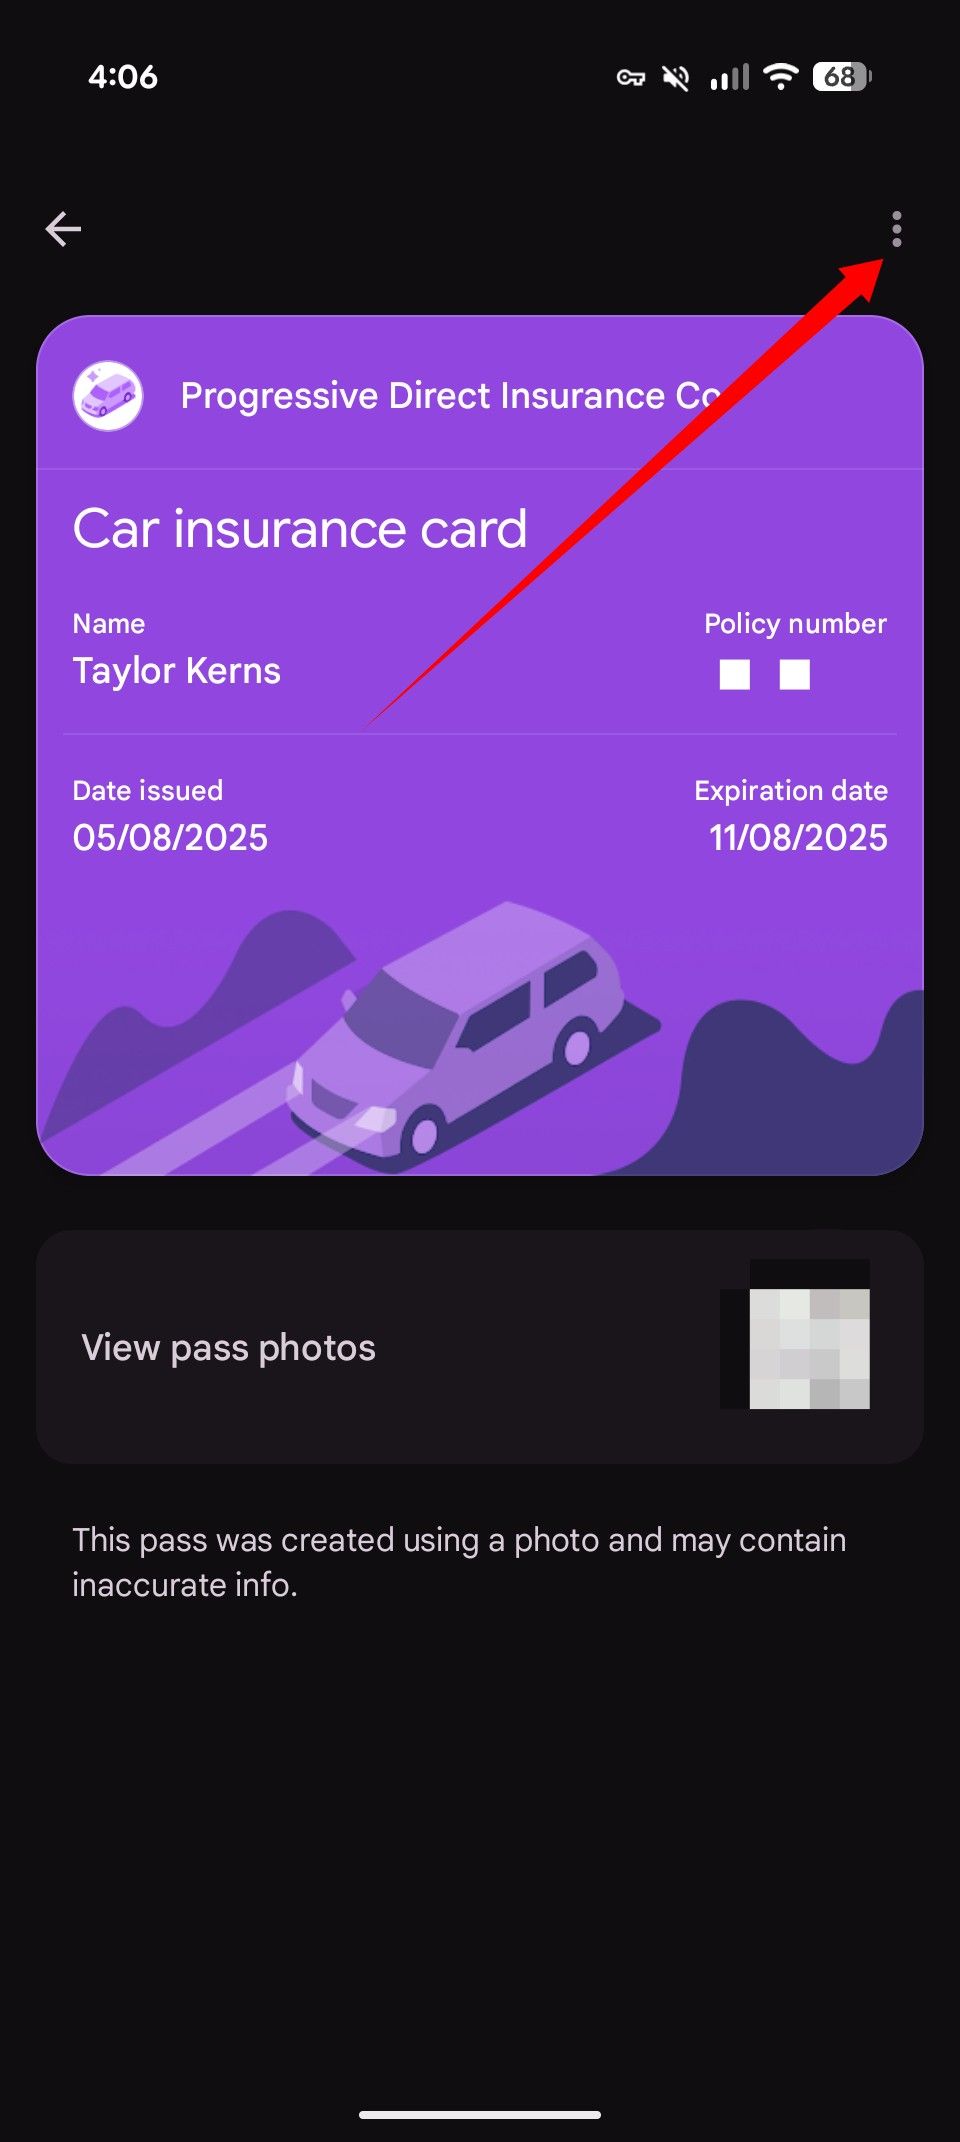
Additional information fields added in the Edit view in step 7 above aren’t displayed on the custom pass graphic. To view any information added manually, tap the three-dot icon in the top right corner when viewing your pass.
How to edit a custom pass
Google just recently introduced the option to edit custom passes after adding them to Wallet, saving you the hassle of reuploading a pass if you spot an error or omission. Here’s how to do that.
Open the Google Wallet app.
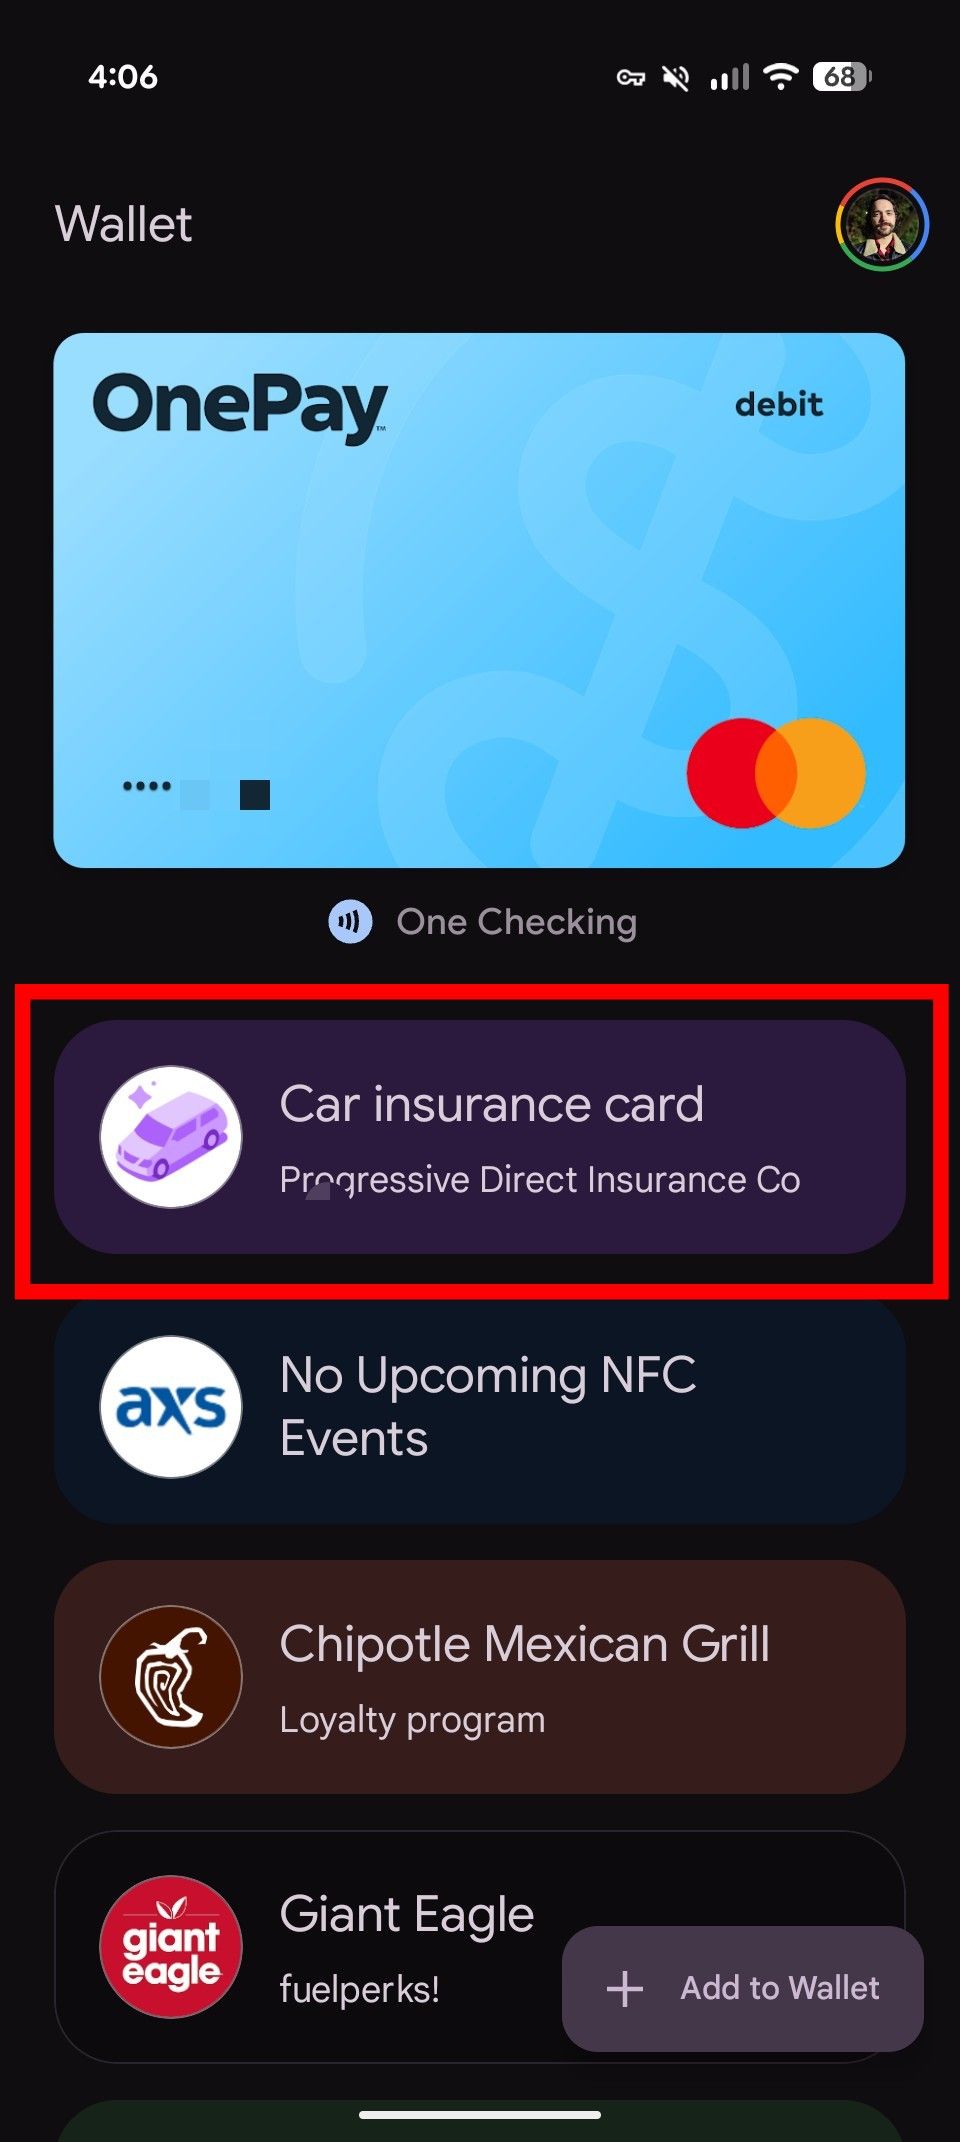
Tap the pass you want to edit.
Tap the three-dot icon in the upper right corner.
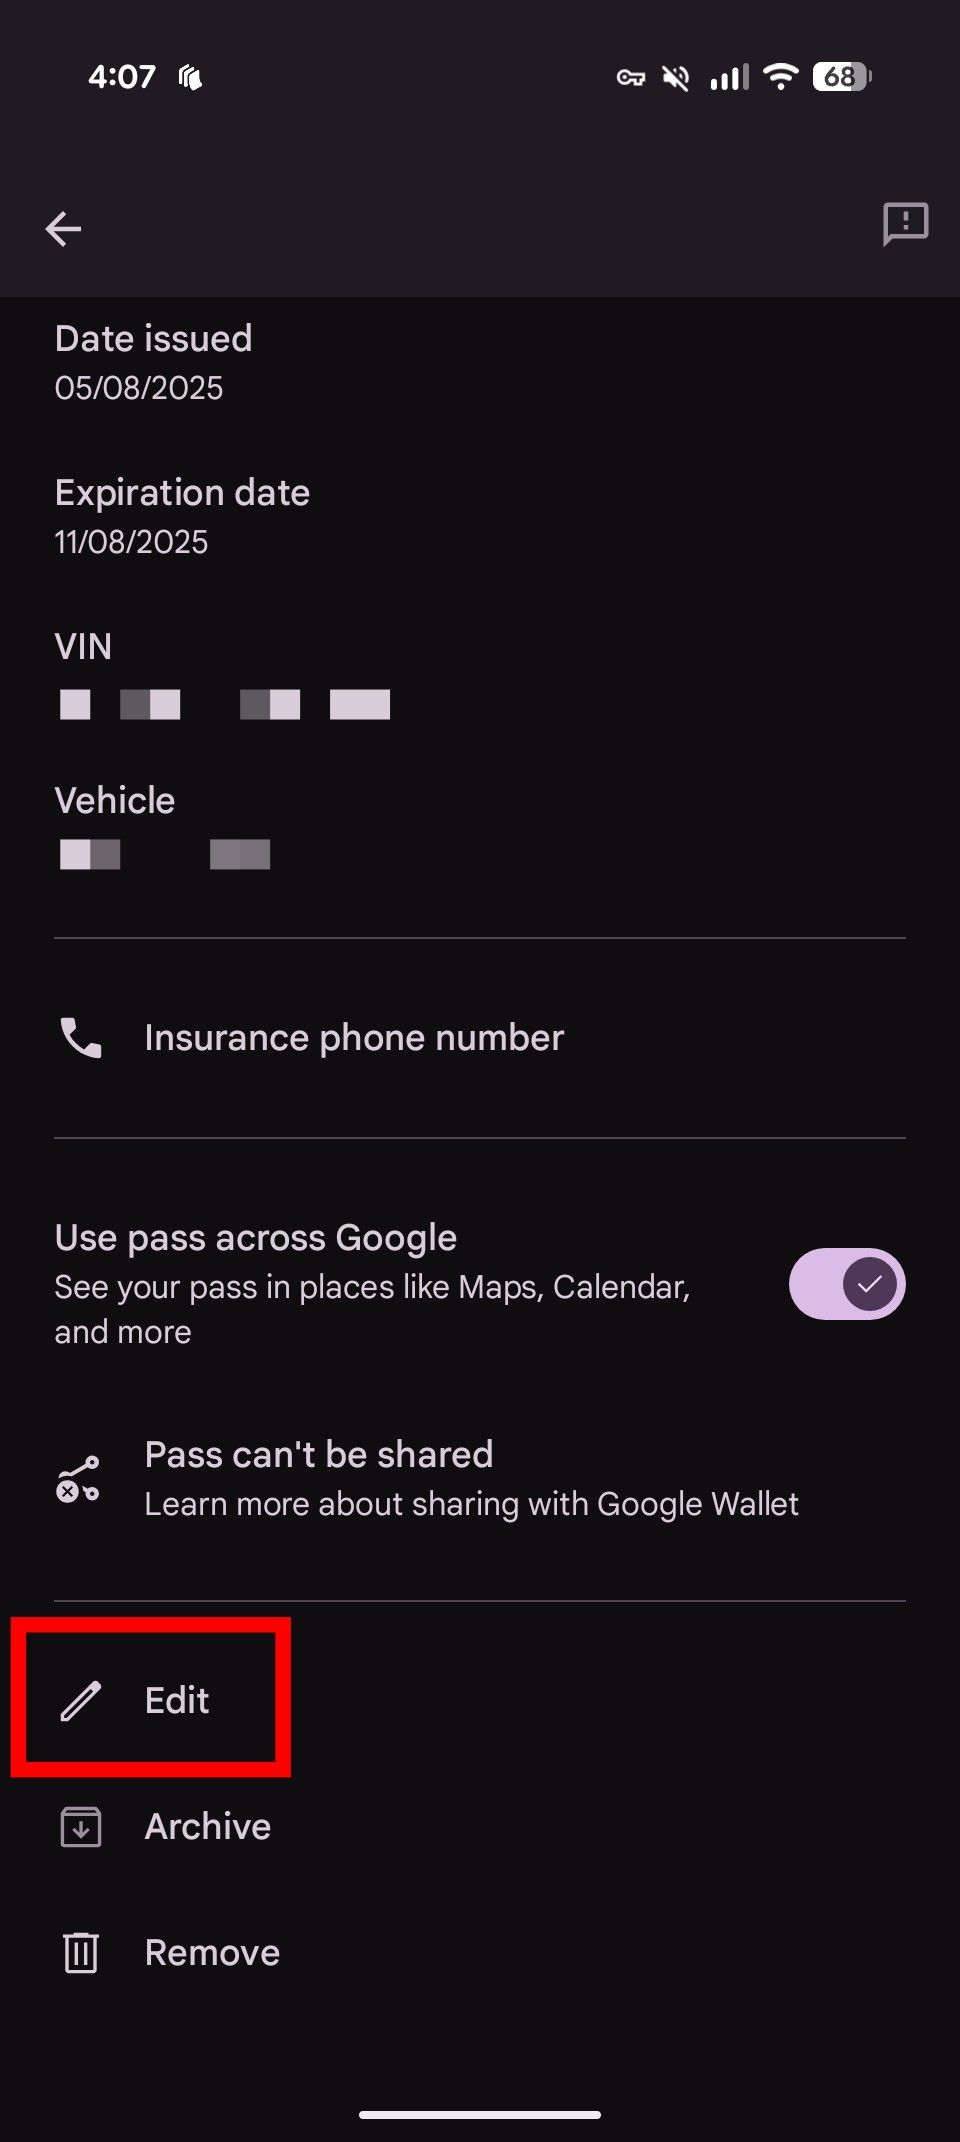
Scroll down and tap Edit.
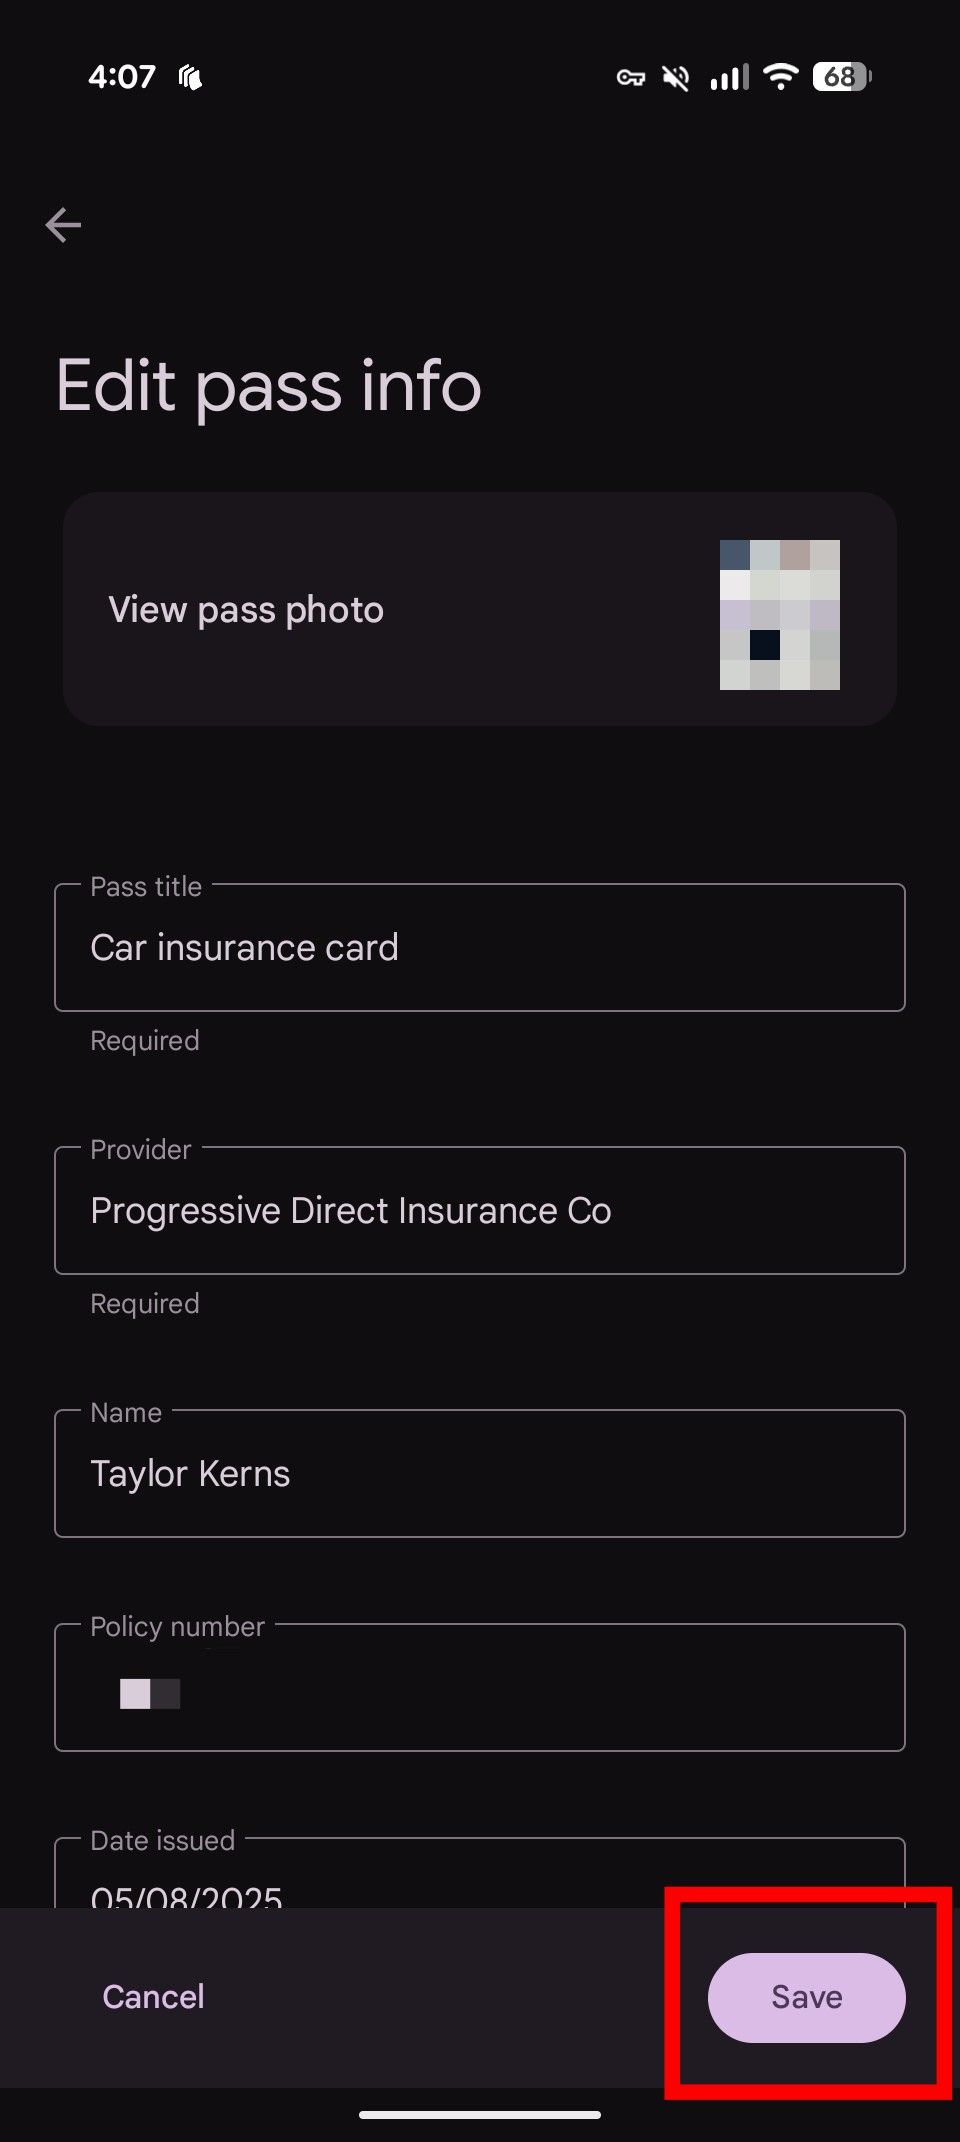
Make your changes, then tap Save.
You’re also able to add additional information fields in the edit view, in case the initial upload missed a detail like your vehicle identification number on a car insurance card.
Google Wallet’s custom pass functionality makes the app infinitely more useful, and Google’s recent decision to allow users to edit documents after uploading them makes it even more convenient still. It’s a great way to keep documents you might occasionally need at hand without actually needing to carry around all that paper.
At NewsPepr.com, we deliver quick, concise, and easy-to-understand news updates from around the world. No more long articles—just the essential details, simplified using AI-powered technology.
🌍 Stay Informed Without the Overload!


